Development Container Setup Guide
Prerequisites
|
Before setting up your Development Container environment, ensure you have:
|
General IntelliJ Settings
-
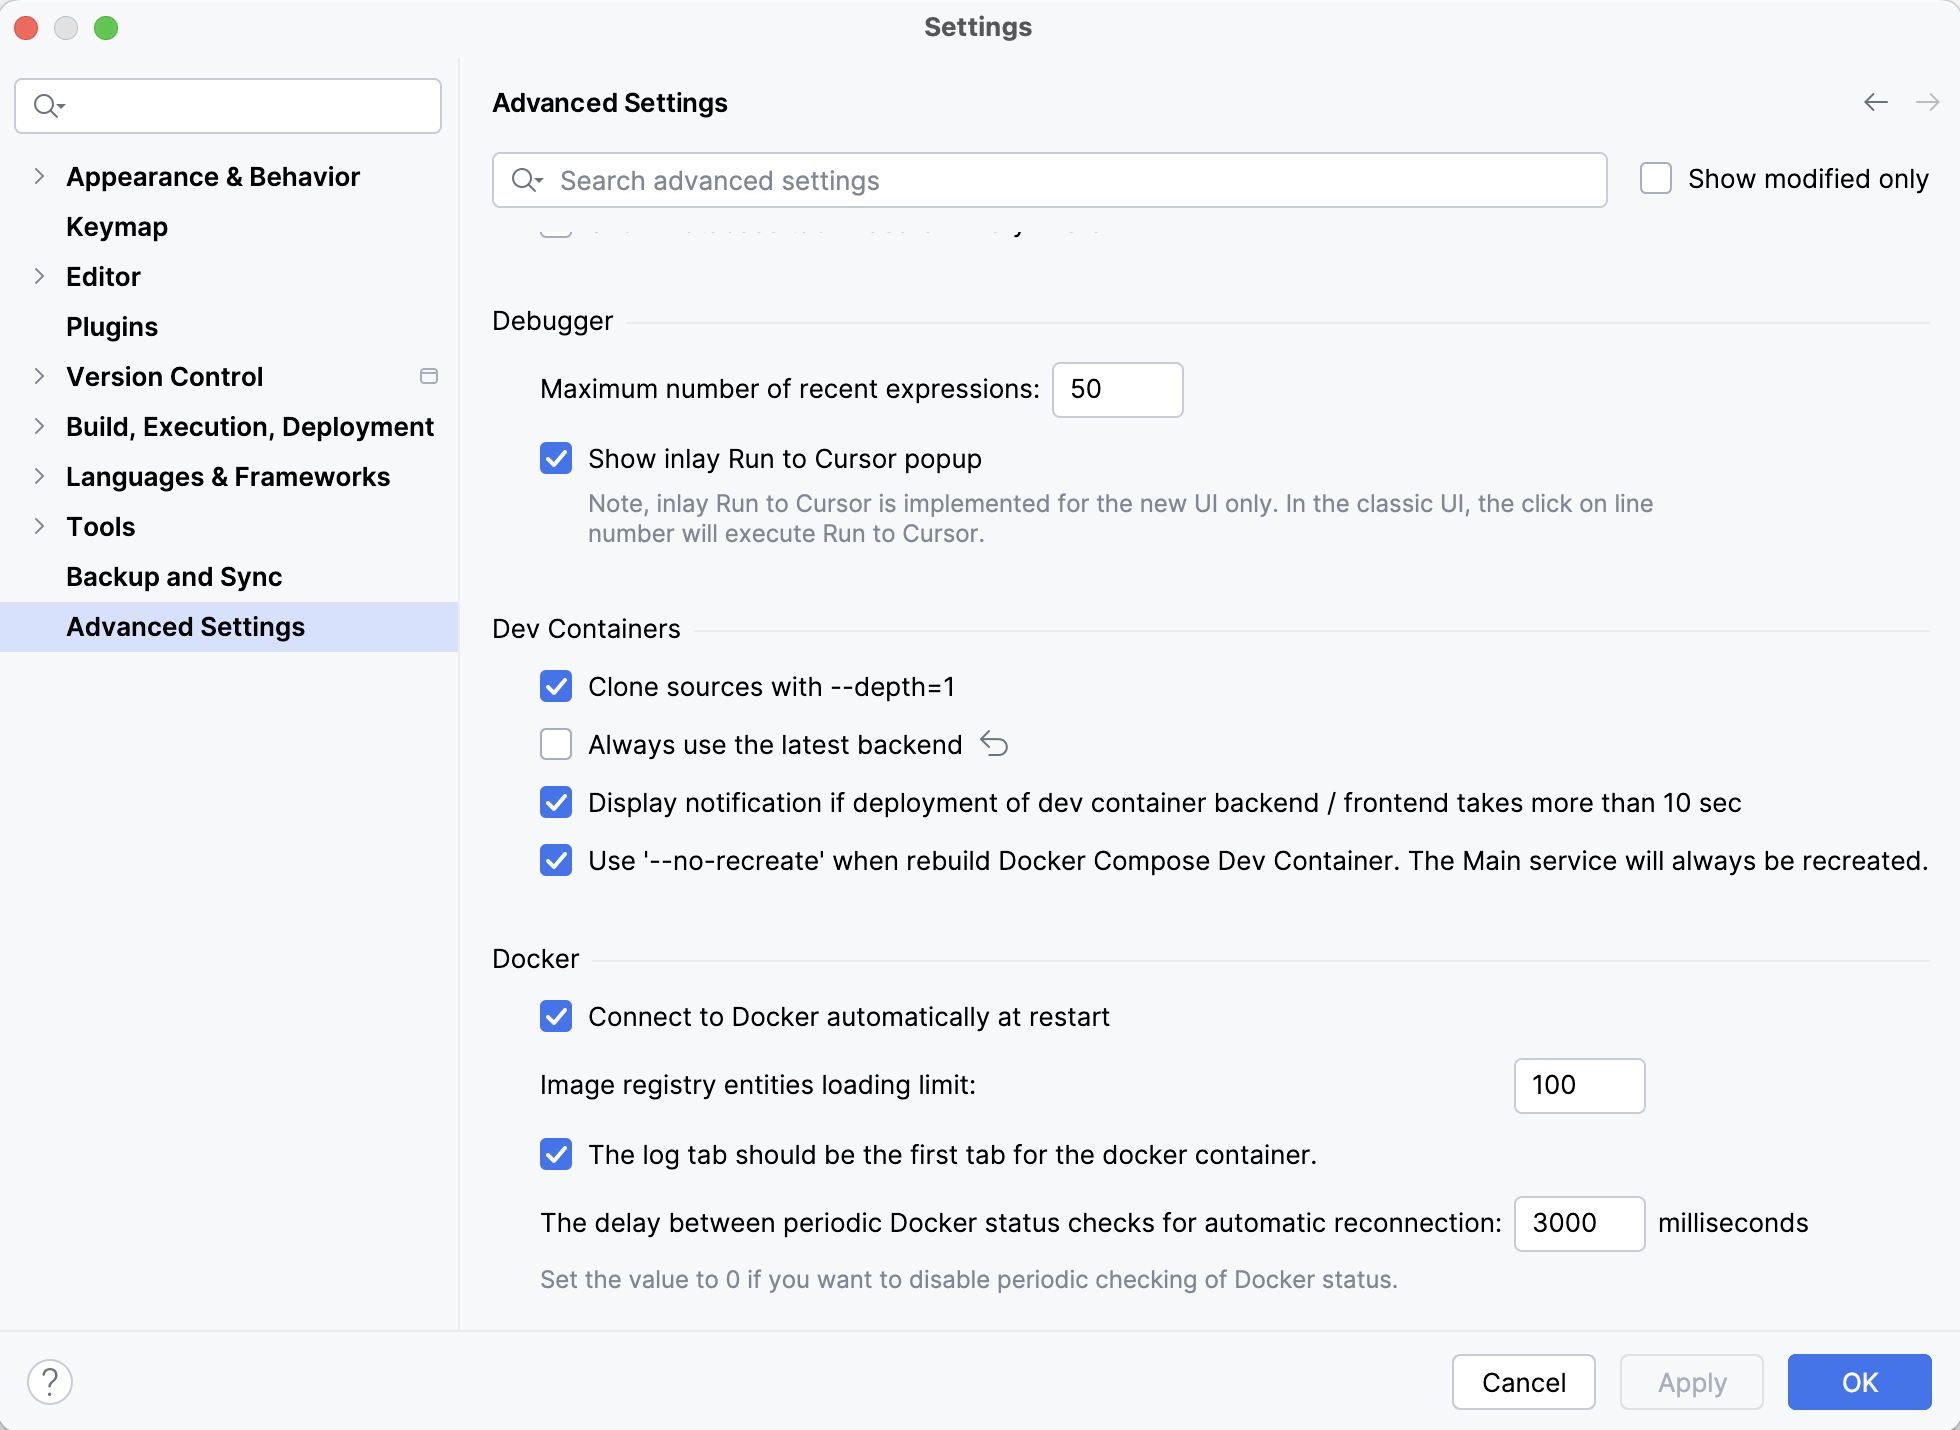
First we need to ensure Jet Brains doesn’t force an Early Access Program (EAP) IDE on us!
-
Unselect the 'Always use the latest backend' box as seen in image
-
-
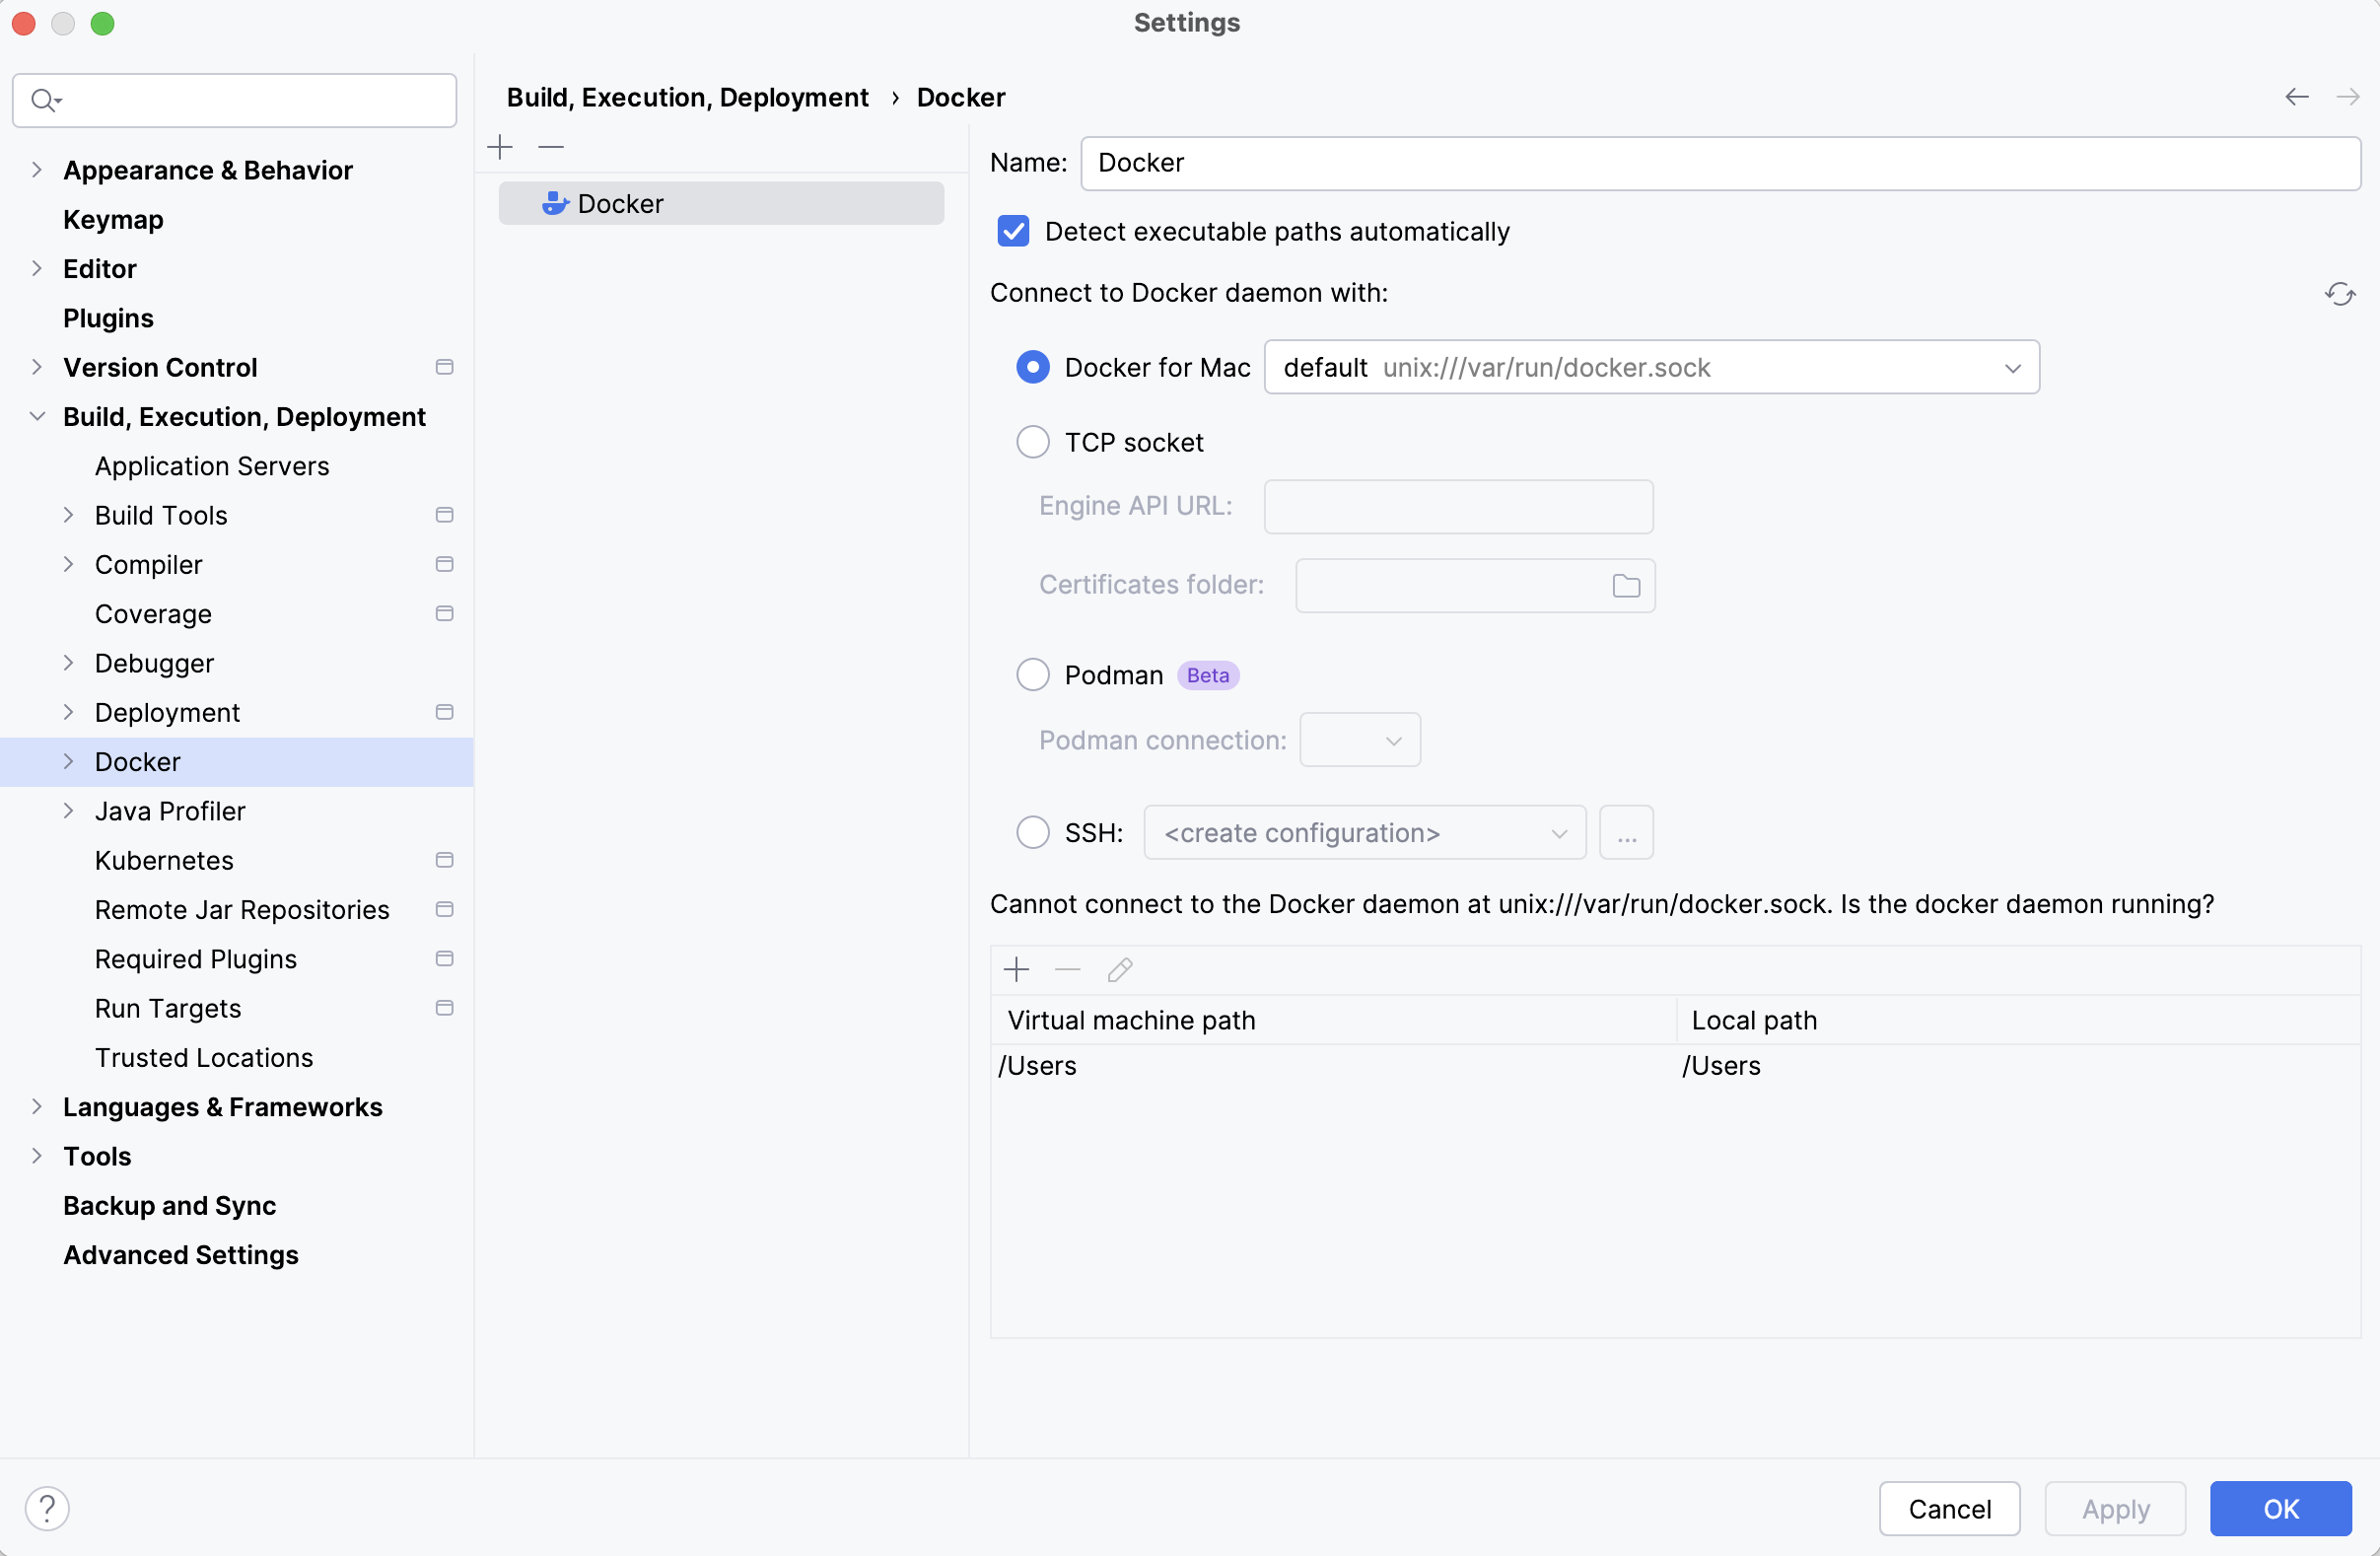
Next lets make sure Docker is setup so we can use in the Services tool window
Getting Started
-
Open project in IntelliJ
-
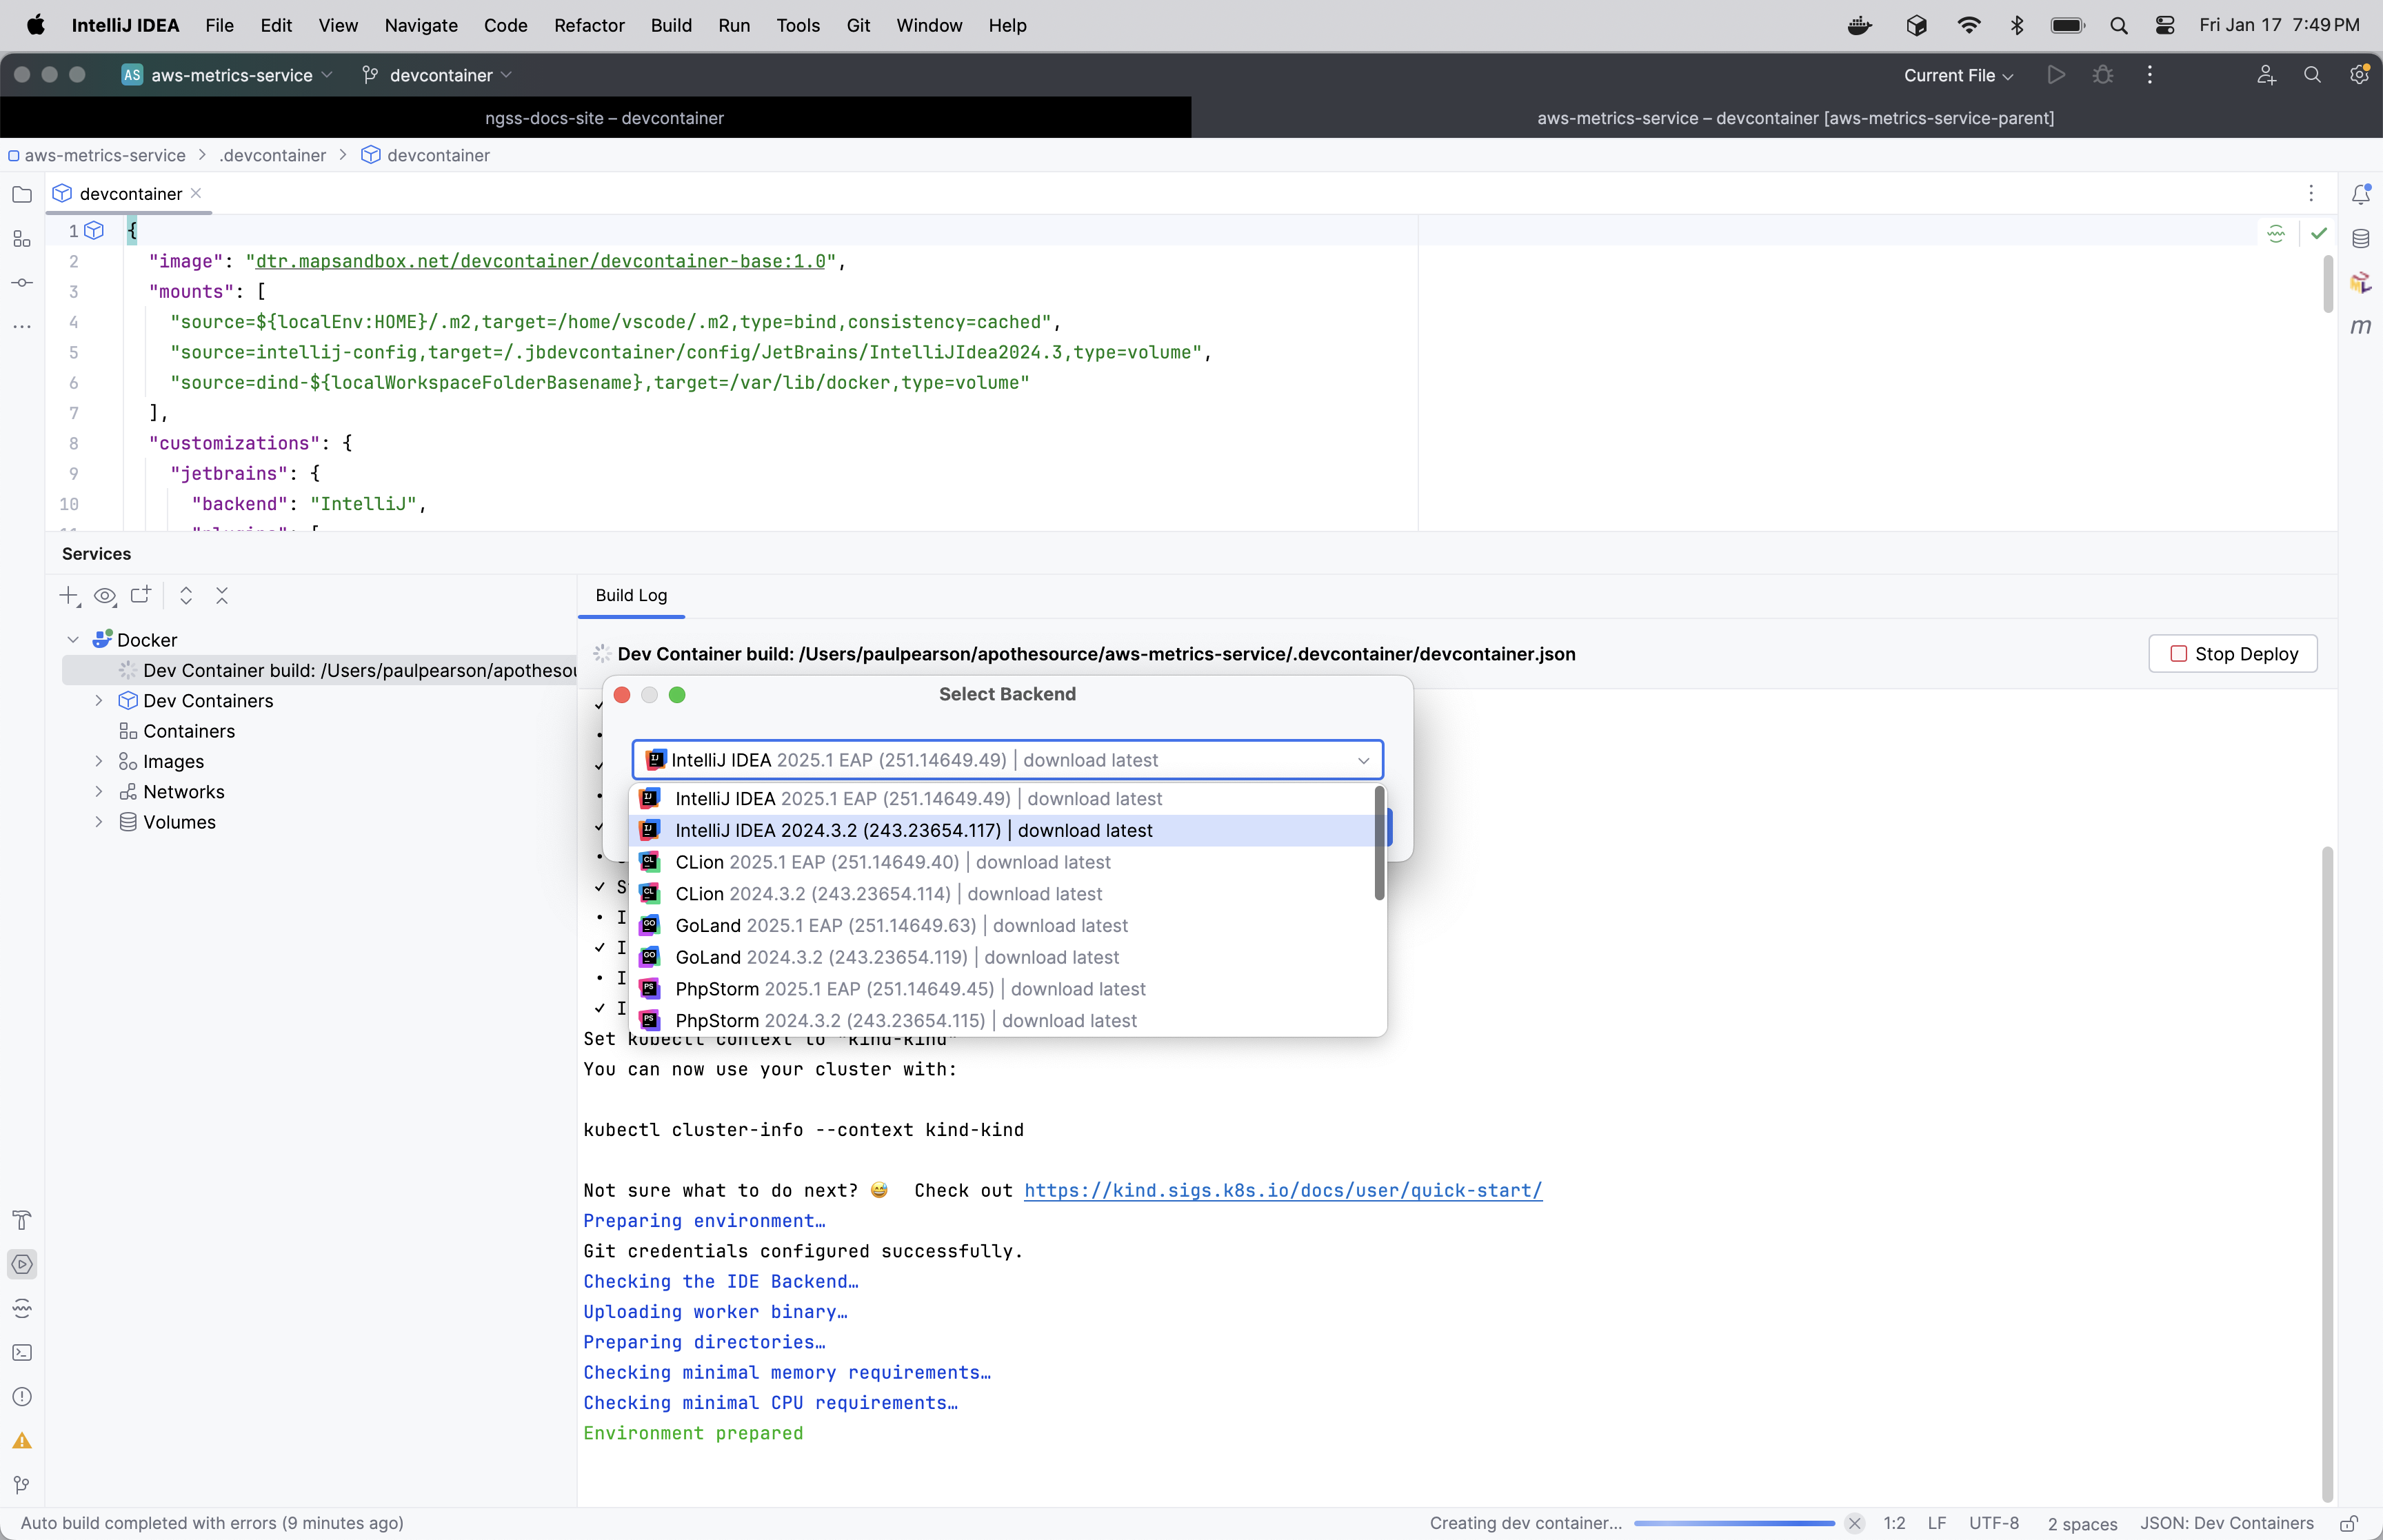
Under the .devcontainer directory open the devcontainer.json and in the top left gutter:
-
Select 'Create Dev Container and Mount Sources'
-
A popup should appear to 'Select Backend'
-
DO NOT SELECT EAP VERSION
-
| If the Headless IDE container appears stuck on 'Downloading the IDE Backend on the remote host…': |
-
In the Services tool window (View → Tool Windows → Services)
-
Under Docker → Containers, there should be a container with a random name (NOT your Dev Container)
-
This is the headless IDE container - select and 'Restart' this container
-
Do NOT restart your Dev Container
-
-
The connection prompt should soon appear for your Dev Container
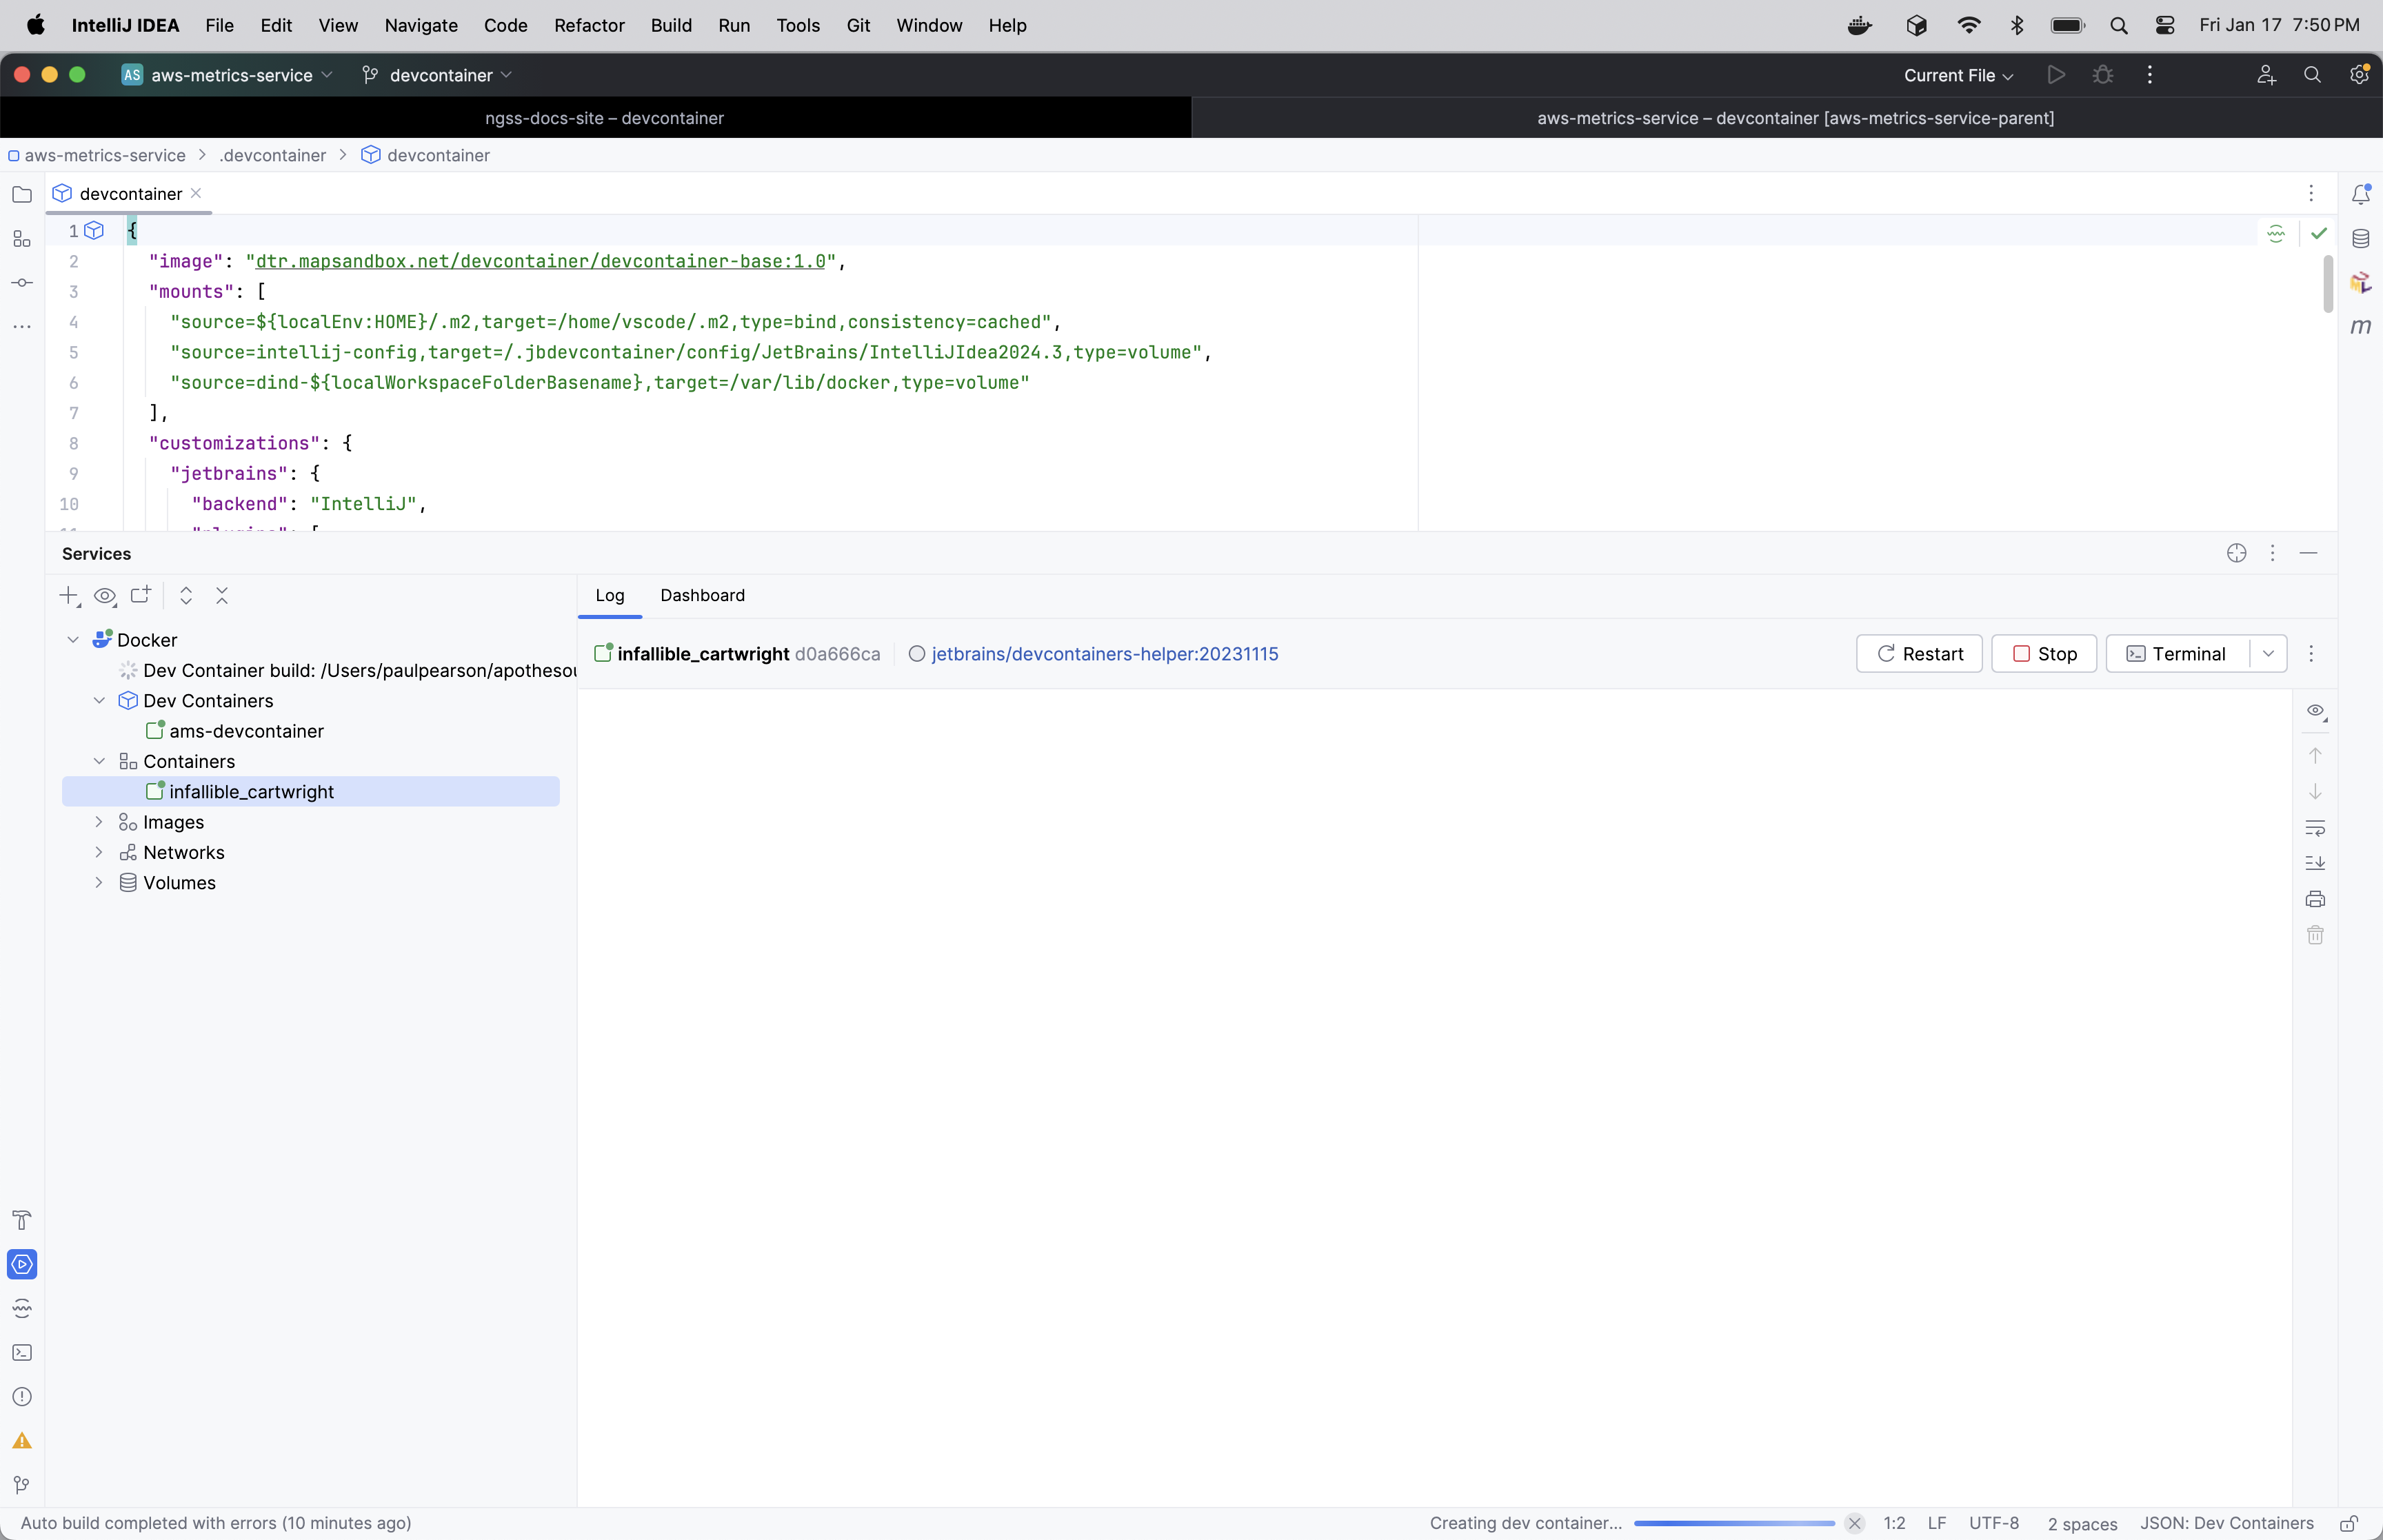
Once everything completes you will see a brand new IDE appear
Post-Setup Configuration
Skaffold Configuration
-
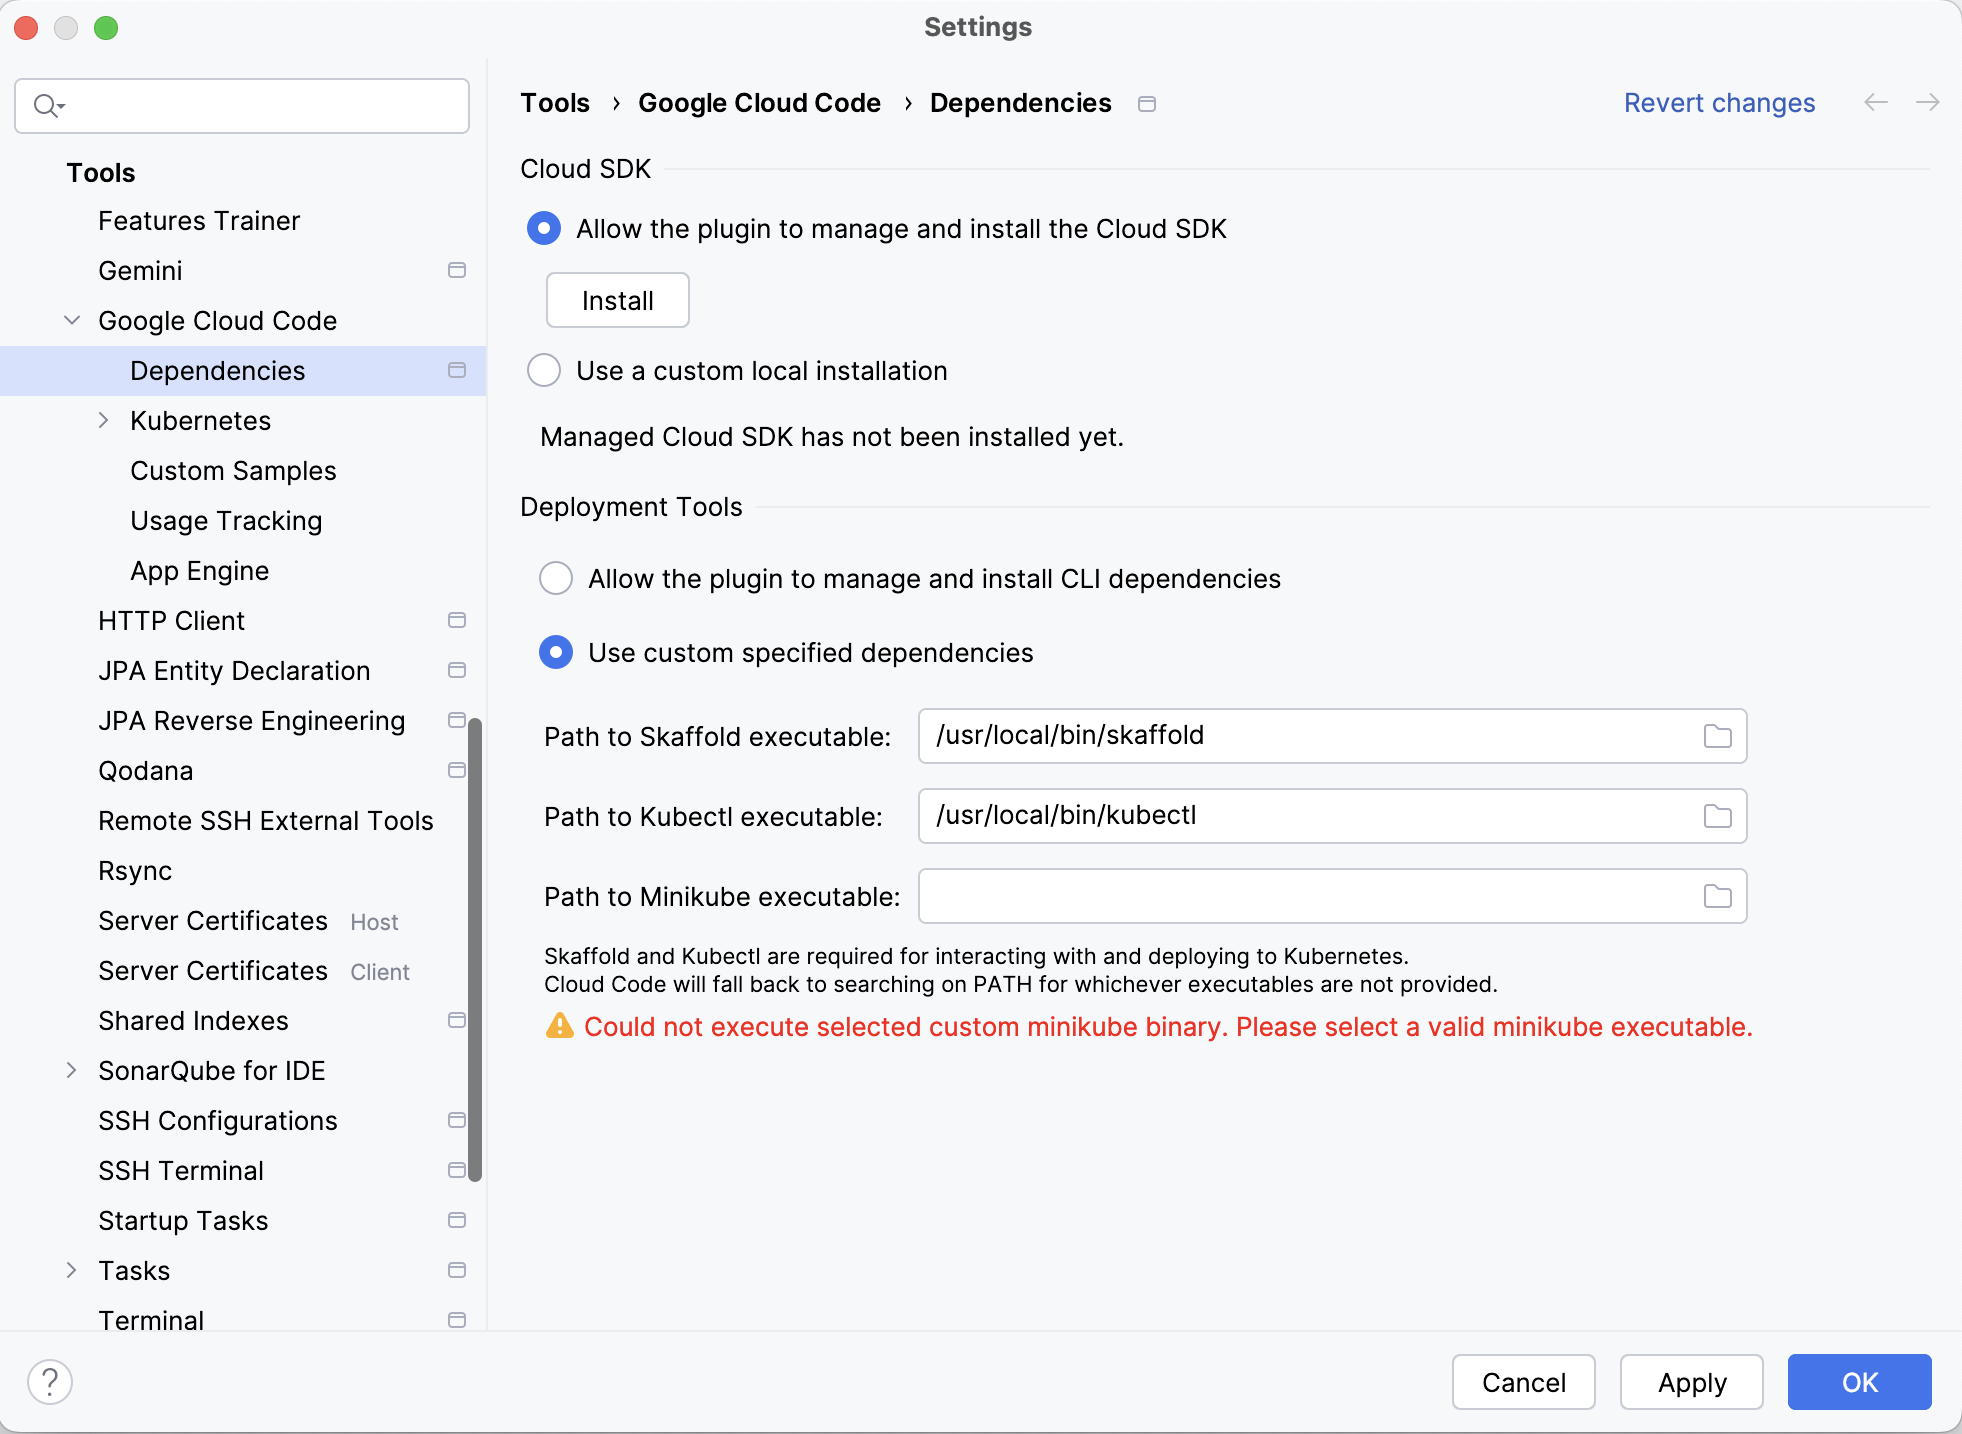
In Headless IDE (inside container) > Settings > Tools > Google Cloud Code > Dependencies:
-
Set paths accordingly:
-
/usr/local/bin/skaffold -
/usr/local/bin/kubectl
-
-
Settings persist across all project containers via
intellij-configvolume
-
-
This essentially covers anything one needs to do to use a Devcontainer. Most other operations remain the same.
-
And as long as your container remains you can access a project from the initial IntelliJ screen under Remote Development